Try a unique twist on drawing flowers.
Create a digital flower still life in 5 easy steps!
This is a fun way to introduce your young artist to digitally altering photos. I recommend doing this project together or better yet…have the whole family involved. Everyone could create their own flower to add to the still life. What a great mother’s day gift (This also could be a great teacher appreciation gift from the whole class)!
If you need flower inspiration take a walk outside and sketch the flowers you see or talk about the shapes that make up the flowers. Nature is always a great free source of inspiration.

Materials:
Drawing Materials
White Paper
Construction Paper
Scanner or Camera
Computer
Printer
Scissors
Glue
Construction Paper
Tutorial:
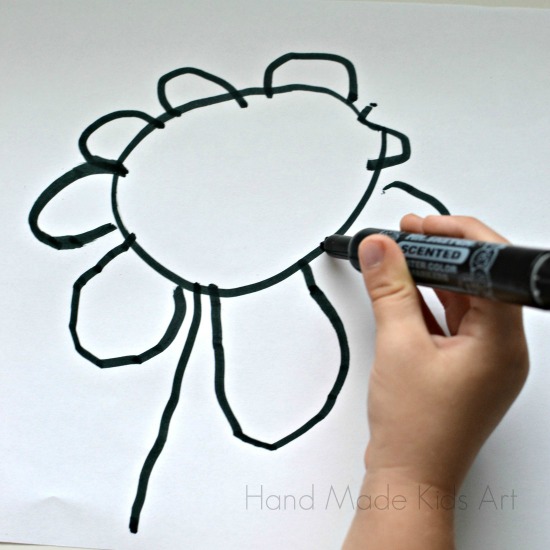
Step 1: Draw your flowers individually along with a vase on white paper.
Step 2: Take a digital photo or scan your flower and vase drawings.
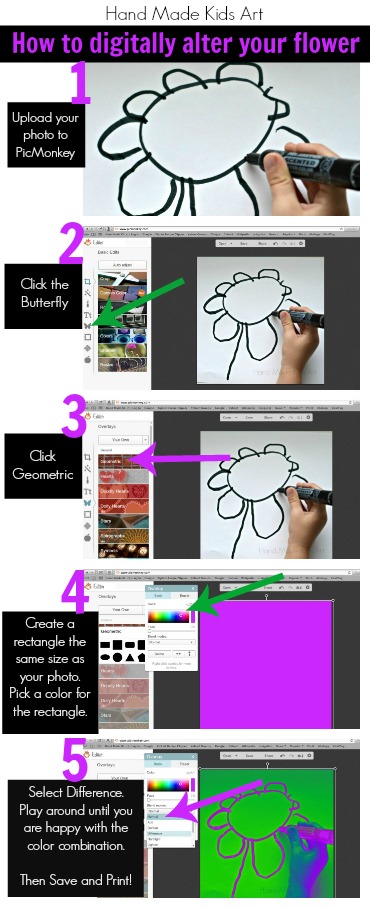
Step 3: Edit your flower and vase photos with a photo editing program (we like PicMonkey and its free!) Shown below is one example of how you can use PicMonkey to create fun colored digital flowers.
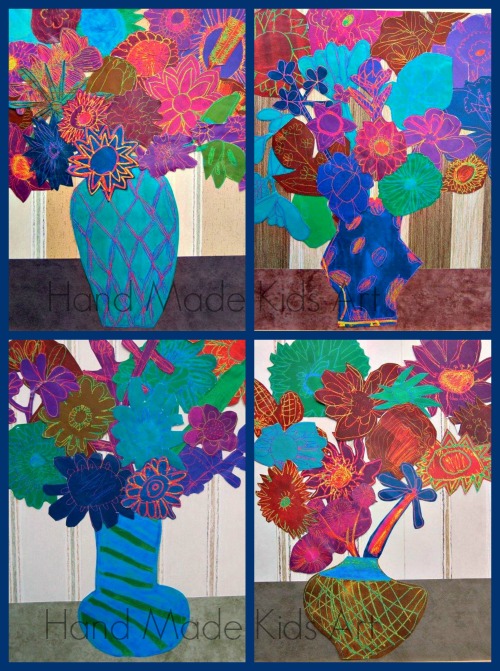
Step 4: Print your flowers and vase and cut out with scissors.
Step 5: Arrange and glue your flowers and vase on to a piece of construction (or scrapbook) paper. We used different colored paper to create a pattern for the background behind the flowers and a darker colored paper for the table that is behind the vase.
Jamie,
This is such a cool idea! I totally want to try this out. The flower tutorial that you shared is absolutely beautiful! This might also be a cool idea to do as an end of year teacher’s gift.
Thanks for sharing!
jen 🙂
Thank you Jen! I agree it would be a great gift for a teacher and an easy way to get the whole class involved. Thank you for commenting! 🙂
How cool is that! My children (and hubby) would love it!
Thank you for commenting. My kids had a lot of fun playing with the different colors on the computer.The best thing is you can print more than one! 🙂
This is such a great gift idea! I will probably have my kiddos do this for homeschool next week for my mom. It’s a great way for them to play around with technology, and make something totally unique! Thanks for the idea. I’m pinning it.
Thanks for pinning! For us it was a great way to introduce photo altering in a fun way. Let us know how it turns out!
How fun! These look awesome! What a fun activity!
Thanks! We had a lot of fun making them! 🙂