Have you played with a light table or light box? We have seen so many amazing diy light boxes we knew we had to try it.
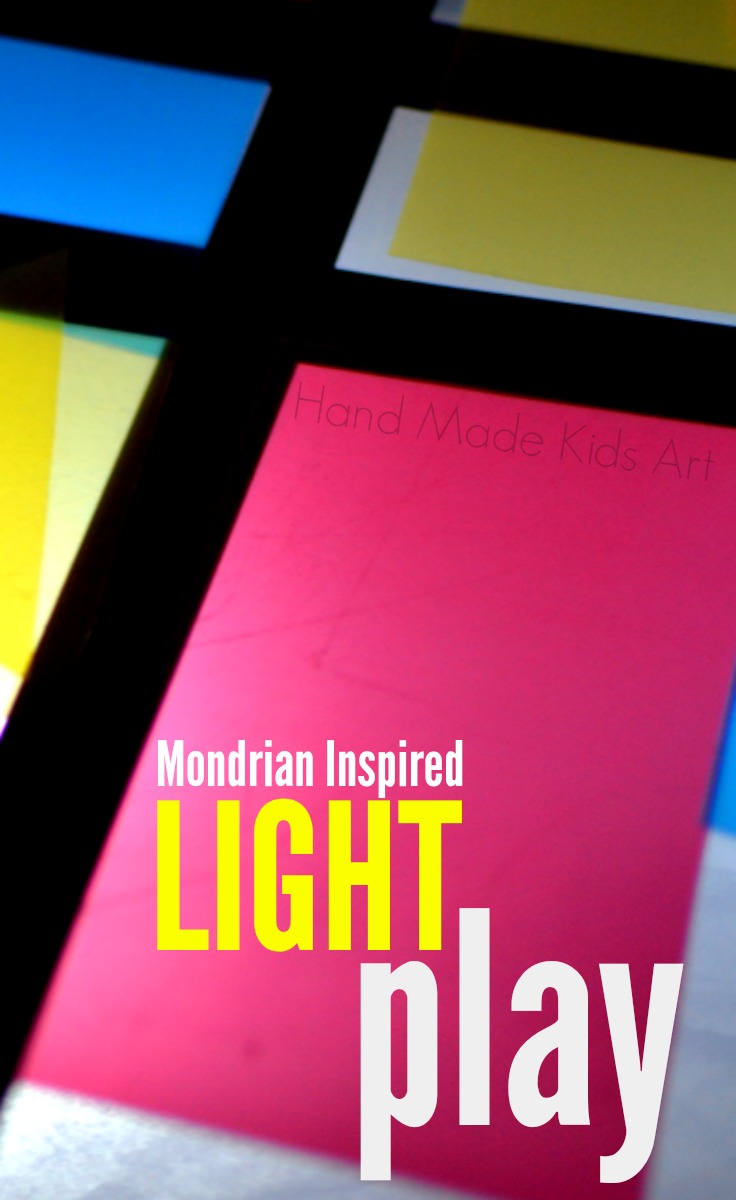
It was a dark and rainy afternoon perfect for playing with the light table but not perfect for running to the store to purchase materials to make one. There are many different versions around the internet like this one from Teach Preschool or this one from Imagination Tree but here is our version of a diy light box made from materials we already had at home. Of course, we couldn’t help but put an art twist on our light play. Inspired by the artist Piet Mondrian we added black lines to visually divide our light table.
Artist Inspiration: Piet Mondrian was a Dutch artist born in 1872. He was known for his paintings that consisted of a white background and a grid of vertical and horizontal black lines. He would add squares and rectangles painted with the primary colors. For more information check out, http://www.piet-mondrian.org.
Read below for our tutorial of a Mondrian Inspired Light Box!
Posts may contain affiliate links. If you purchase a product through an affiliate link, your cost will be the same but Hand Made Kids Art will automatically receive a small commission. Your support is greatly appreciated
Materials:
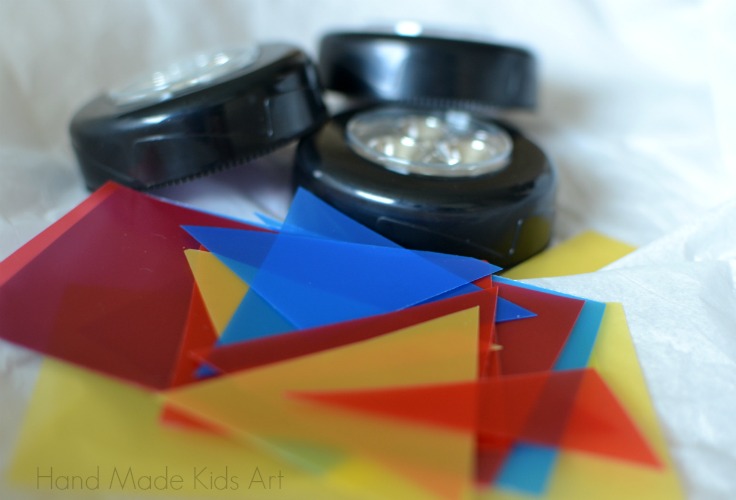
Black Tape (We used black electrical tape)
Scissors
Tutorial:
Step 1: Make your light box (if you already have a light table skip to step 2). To make your own (cheap) diy light box, turn on the LED lights and place inside the plastic container. Our LED lights did need double AA batteries. We laid white tissue paper on top of the lights to help diffuse the LED lights (this is optional, it still works without the tissue paper). Place the storage lid back on. We turned our plastic storage container upside down because it was a smoother surface on the bottom.
Step 2: Use the black tape to make horizontal and vertical lines on the light table surface.
Step 3: Cut up the colored file plastic dividers into different size rectangles and squares.
Step 4: Play with the shapes!

What are your favorite things to play with on the light table?
Follow Us on Pinterest Follow Jamie | Hand Made Kids Art’s board Elementary Art on Pinterest.
This is awesome! I love this idea for light play + art!
Thank you! As an art teacher, I love adding that art twist wherever I can. 🙂
Thank you for sharing! It looks awesome. I want to share with you a little short list that I found. It has some sweet crafts for the summer!
http://blog.famtivity.com/craft-roundup-2/
Wonderful way to share Mondrian with kids! So simple too.
great ideal for a preschool class room . Thanks .
Yay, I am glad you liked it and thank you for commenting! 🙂