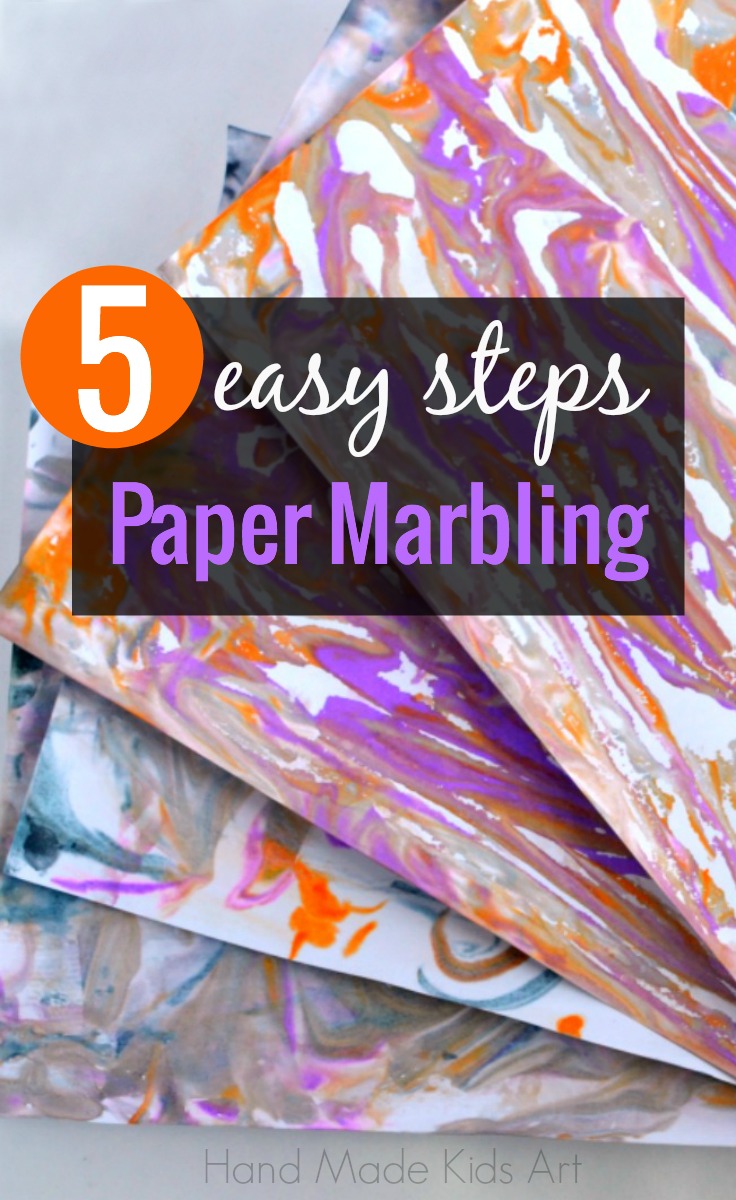
Here is an easy and fun way to create your own diy paper marbling. Perfect way to have some creative fun and create some decorative paper with your kids with a few basic household materials. Lil B enjoyed watching the colors swirl together with the shaving cream. He was even more amazed at the marble pattern in created on the paper. Use the marbled paper for scrapbooking, making cards or creating collages.
Materials:
Pan
Liquid Watercolors or Food Dye
Shaving Cream
Plastic Knife
Card stock Paper
Tutorial:
Step 1: Fill the pan with shaving cream.
Step 2: Squeeze a few drops of liquid watercolors or food dye
Step 3: Using the plastic knife swirl the colors in the shaving cream. *Careful to not over mix if you are using multiple colors the colors may mix together and turn brown.
Step 4: Lay your card stock paper on top and using your hands press the paper down.
Step 5: Lift off the paper and scrap off the excess shaving cream. Let paper dry completely
There are so many possibilities to create with your own decorative marbled paper. What will you create? Share with us!
Follow us on Facebook, Instagram, Twitter or Google +!
Leave a Reply